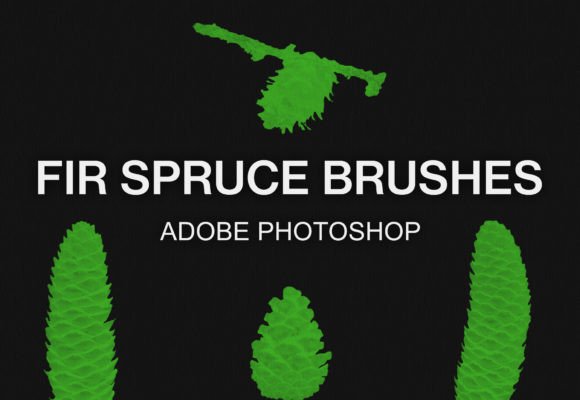
Mastering Nature Textures: A Guide to Fir and Spruce Cone Photoshop Brushes
Adding realistic natural elements to digital artwork can be the difference between a flat composition and a piece that breathes with life. Whether you are designing a winter holiday card, creating a rustic brand identity, or texturing a fantasy landscape, the details matter. This is where specialized tools like Fir and Spruce Cone Photoshop Brushes become invaluable. Instead of manually painting every scale and shadow of a pinecone, these digital assets allow you to stamp high-fidelity textures instantly. However, simply downloading a pack isn't enough; understanding how to integrate them correctly into your workflow is essential for professional results.
Many creators, from hobbyists to seasoned graphic designers, often overlook the technical nuances of using texture brushes. A common misconception is that all brush files work identically across different software versions or that installation is a one-size-fits-all process. When users rush this step, they often end up frustrated, unable to locate their new tools, or worse, applying them in ways that look repetitive and artificial. To get the most out of a 32 photoshop fir and spruce cone brushes pack, you need to approach the installation and application with a bit of strategy.
Avoiding Installation Pitfalls Across Different Software
One of the most frequent mistakes occurs right at the beginning: the installation process. Users often assume that because a file is labeled for Adobe Photoshop, it won't work elsewhere, or they struggle to find the correct directory for manual installation. This bundle is versatile, suitable for both Adobe Photoshop and GIMP, but the paths to activation differ significantly.
For Photoshop users, the process is streamlined, yet errors still happen. Many people try to drag and drop files into the wrong panel or attempt to load them via the "Open" command rather than the brush preset manager. The correct, efficient method ensures the brushes are ready immediately without cluttering your workspace. Conversely, GIMP users often get lost in the file directory structure. Because GIMP does not always support direct double-click installation for certain brush types depending on the version, knowing the exact folder path is critical. Failing to place the file in the specific share/gimp/2.0/brushes directory means the software will never recognize the new assets, leading to unnecessary troubleshooting time.
Another overlooked detail is the file format itself. These brushes come in the .ABR format. While Photoshop reads this natively, GIMP requires specific handling. Some users mistakenly try to convert these files unnecessarily or download incompatible versions. Understanding that the .ABR file is the key component saves you from hunting for alternative formats that might lack the original pressure sensitivity or texture depth intended by the creator.
Enhancing Realism and Avoiding the "Stamped" Look
Once installed, the next challenge is application. A major pitfall when using any texture brush, including fir and spruce cones, is overuse. When an artist clicks the same brush repeatedly in a pattern, the human eye quickly detects the repetition. This "stamped" look breaks the illusion of reality and can make a professional project appear amateurish. The issue isn't the quality of the Fir and Spruce Cone Photoshop Brushes; it is how they are deployed.
To avoid this, you must vary your approach. Do not rely on a single brush from the 32-pack for an entire scene. Instead, rotate through the different variations provided. Each brush in the set likely offers a slightly different angle, lighting condition, or species variation. By mixing these, you create organic diversity. Furthermore, adjust the opacity and flow settings. A common error is leaving the brush at 100% opacity, which creates harsh, solid edges that rarely exist in nature. Lowering the opacity allows you to build up the texture gradually, mimicking how light actually hits the rough surface of a cone.
Color correction is another area where mistakes frequently occur. Beginners often paste the default brown or green brush directly onto a background without adjusting the hue to match their specific color palette. If your design features a stylized, cool-toned winter theme, a warm, earthy brown cone might clash. Use adjustment layers or the hue/saturation tool to blend the brush seamlessly into your environment. This small step transforms the element from a foreign object into an integrated part of your composition.
Step-by-Step Integration for Optimal Workflow
To ensure you are setting yourself up for success, follow these corrected workflows tailored to your specific software. These steps eliminate confusion and ensure your 32 photoshop fir and spruce cone brushes pack is ready for immediate creative use.
Installing in Adobe Photoshop
The beauty of working with Photoshop is its user-friendly handling of brush presets. Avoid the mistake of digging through system folders manually unless necessary. Follow this direct route:
- Unzip the Archive: Locate the downloaded file on your computer and extract the contents. You are looking for the .ABR file inside.
- Direct Activation: Simply double-click the .ABR file. In most modern configurations, this action automatically launches Photoshop (if it isn't already open) and loads the brushes into your current preset list.
- Verification: Select the Brush Tool, open the brush picker, and scroll to the bottom of the list. Your new fir and spruce cones should appear there, ready to use.
- Create: Start experimenting with size and rotation to see how the textures behave on your canvas.
Installing in GIMP
GIMP requires a more hands-on approach regarding file management. The most common error here is pasting the file into the root GIMP folder rather than the specific sub-folder for brushes. Adhere to this path for guaranteed results:
- Locate the Directory: Navigate to your local disk. On Windows, this is typically found under
C:\Program Files\GIMP 2\share\gimp\2.0\brushes. On macOS or Linux, the path may vary slightly but will follow theshare/gimp/2.0/brushesstructure within the application support folders. - Prepare the File: Unzip the downloaded archive to access the .ABR file.
- Transfer: Copy the .ABR file and paste it directly into the
brushesfolder identified in step one. - Refresh: Open GIMP or, if it is already running, go to the Brushes dialog and click the refresh icon. The new cones should now populate your list.
- Experiment: Test the brushes on a new layer to ensure pressure sensitivity is active.
Making the Right Choice for Your Projects
Before integrating these tools into a client project or a personal portfolio piece, consider the resolution and scalability. A frequent oversight is using low-resolution brushes for large-format prints. While this specific pack is designed for high-quality output, always check the pixel dimensions of the brush tip against your document size. If you are creating a billboard or a large poster, test the brush at 100% zoom to ensure the edges remain crisp and do not appear pixelated.
Additionally, think about the context of your design. Fir and spruce cones evoke specific feelings—rustic, natural, wintery, or organic. Using them in a high-tech, futuristic interface might create cognitive dissonance unless done with ironic intent. Ensure the texture aligns with the emotional tone you wish to convey. For marketers and small business owners, this alignment is crucial for brand consistency. A bakery using these brushes for a holiday promo feels natural; a law firm might need to exercise more caution.
Ultimately, the value of this bundle lies in its ability to save time while enhancing visual fidelity. By avoiding installation errors, varying your application techniques, and matching the texture to your design goals, you elevate the quality of your work. Whether you are a freelancer looking to speed up your workflow or an educator teaching digital art principles, mastering these details ensures that your final output looks polished and intentional. Take the time to explore all 32 variations in the pack; the subtle differences between them offer a wealth of creative possibilities that a single generic brush could never provide.
Ready to expand your toolkit further? Visit our shop to explore more specialized brush bundles designed to streamline your creative process and enhance your digital artwork.